
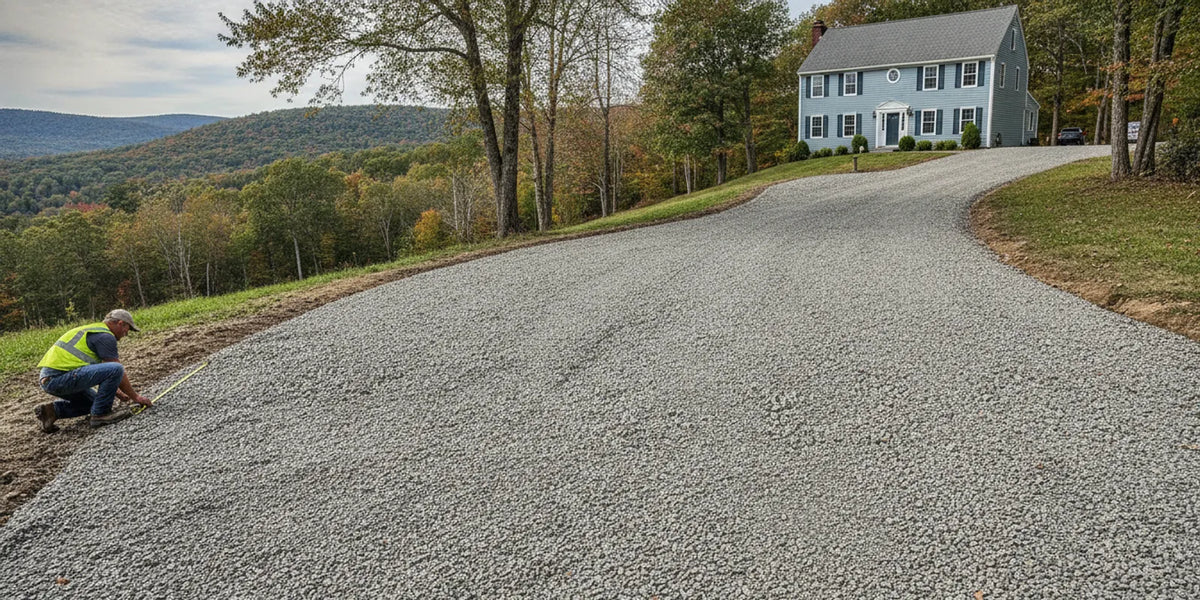
Planning how to build a gravel driveway starts before choosing stone. The driveway needs to fit its use, ground conditions, drainage, and the way trucks can reach the site. This guide walks through those decisions, shows how to estimate material, and explains what to confirm before ordering. The right section sizes and materials depend on the specific site, so treat the steps as a planning framework, not a universal construction design.
Ask about driveway material or project needs
Define the driveway job before choosing material
Begin by describing what the finished driveway must do. A short parking spur used by passenger cars has different demands from a long shared drive used by delivery vehicles, equipment, or frequent heavy trucks. The intended use affects the width, turning space, surface condition, and the amount of maintenance you should expect.
Write down the details that will shape the work:
- Traffic: How many vehicles use it, how often, and whether loaded trucks or construction equipment need access.
- Route: The path from the road to parking, including curves, gates, grades, and areas where vehicles turn or stop.
- Footprint: Approximate length and width, plus any widened areas, parking pads, or turnarounds.
- Existing surface: Whether the route is lawn, soil, old gravel, asphalt millings, or a mixture of materials.
- Water behavior: Where runoff travels now, where it ponds, and whether nearby buildings, slopes, ditches, or property lines may be affected.
- Constraints: Trees, utilities, drainage structures, retaining edges, overhead wires, narrow entrances, or other features that limit excavation or truck movement.
Take photographs from the road and from several points along the route. Mark the intended edges on a sketch, even if the dimensions are rough at first. A simple plan helps distinguish the driveway itself from adjoining lawn, drainage work, or a separate parking area. It also helps a supplier or contractor ask useful follow-up questions.
For a commercial or shared drive, include expected vehicle types and operating needs in the plan. A site that must remain open during work may need staging and delivery coordination. Avoid assuming that a material suitable for a light-duty residential route will meet a heavier traffic requirement. When the consequences of a surface failure are significant, get site-specific advice from an appropriately qualified local professional.
Review the site, ground, and water
Walk the route after rain if possible. Note low spots, soft areas, standing water, and places where runoff crosses the proposed driveway. Water that remains in the roadbed can soften the supporting ground and move aggregate. Adding more surface stone without understanding the source of the water may not correct the underlying problem.
Consider the whole drainage pattern, not just the driveway centerline. Water needs a safe route away from the travel surface without creating a problem for a building, neighboring property, public road, or existing drainage system. A driveway may require grading, a ditch, a culvert, or other drainage work, depending on its setting. Requirements vary by site and local rules. Do not treat a standard slope or a single cross-section found online as a design for every property.
Look for evidence of weak or variable ground. Deep tire ruts, soft soil, organic debris, buried fill, or seasonal wetness can change the preparation needed. Existing gravel can also conceal a weak base or water-related issue. If the route has a steep grade, unusual soils, a stream or wet area nearby, or significant runoff, ask a local professional or relevant authority what assessment and approvals are needed before excavating or placing material.
Locate underground utilities before digging. Identify property boundaries and any easements that may affect the route. Check with local authorities about access permits, roadside drainage, culvert requirements, stormwater rules, and any restrictions on work near the public right-of-way. The correct contact varies by location and project. Confirm these matters early; a material order cannot resolve a permitting or drainage issue.
These site observations help determine whether your task is a straightforward surface refresh or a more involved construction project. If you are only replenishing an existing, sound driveway, the work may be mostly about cleaning up loose material, correcting modest surface irregularities, and adding an appropriate wearing layer. If you are creating a new route through lawn or soft ground, plan for excavation, subgrade preparation, possible separation fabric, base aggregate, surface aggregate, and drainage work as appropriate.
Plan the cross-section as layers, not one pile of stone
A gravel driveway is generally built as a prepared foundation with one or more aggregate layers. The exact materials, thicknesses, and installation methods depend on the ground, expected traffic, climate, drainage, and local practice. A product description alone cannot establish the right driveway section for every site.
Prepare the subgrade
The subgrade is the soil or existing ground that supports the driveway layers. Before adding aggregate, the work area may need to be cleared of vegetation, roots, organic soil, loose debris, and unsuitable material. The prepared ground should be shaped and made stable enough for the intended work. Simply spreading stone over grass or loose topsoil can leave the new surface prone to mixing, settling, and rutting.
How much excavation is appropriate is a site decision. Removing too little unsuitable material may leave a weak spot. Removing more than necessary can add cost, create disposal needs, or affect drainage. Check what lies below the visible surface before planning the excavation. If the subgrade is soft, saturated, or inconsistent, pause and get advice on how to address it rather than covering the problem and assuming the gravel will solve it.
Consider separation or stabilization where conditions warrant
Geotextile fabric or other stabilization methods may be considered where soil and aggregate need separation or where ground conditions call for added support. These products have different functions and specifications. A fabric is not a substitute for drainage design, suitable aggregate, or proper preparation. Ask the person responsible for the driveway design or installation whether a separation layer is appropriate for the site and what type is intended.
Do not place fabric over standing water, buried organic material, or an unresolved soft area and assume the issue is handled. The base underneath still matters. Installation details, overlaps, edge treatment, and the compatibility of fabric with the project are best confirmed with the installer or a qualified local adviser.
Choose a base aggregate for support
The base layer provides the supporting structure beneath the surface. Depending on the design, it may use a compactable aggregate with a blend of particle sizes. Smaller particles can help fill spaces between larger pieces, but the appropriate product depends on the application and local specifications. Ask for the product name and gradation intended for the base, rather than ordering a material only because it is called gravel or stone.
Base material is typically placed and compacted in a planned sequence. A single thick, loose lift may not compact evenly. The correct lift depth and equipment depend on the material and conditions. If a contractor is doing the installation, ask what material is planned, how it will be placed, and how compaction will be checked. If you are doing the work yourself, confirm handling and compaction guidance with the supplier and equipment provider.
Select a compatible surface layer
The surface layer is what users see and drive on. It should work with the base below it and the intended traffic. Some surfaces use a compactable blend; others use a more open or decorative stone, depending on the design. A clean, uniform decorative stone may look attractive, but it may behave differently from a compactable driveway surface. Choose by function first, then appearance.
Consider whether the top layer will be easy to replenish and maintain. Loose stone can migrate from the driving area, especially at edges, curves, and slopes. A surface with too much fine material may become muddy or dusty in some conditions, while coarse or rounded stone may be harder to keep in place. Ask about the material's particle size and composition, and explain whether the priority is compaction, drainage, appearance, or a particular maintenance approach.
Product naming can be local. Gradation labels, stone sizes, and blend descriptions are not always interchangeable between suppliers or regions. Review the particular product description and confirm that it is stocked for the relevant warehouse. Sagamore's aggregate selection is a starting point for comparing available materials, not a site-specific driveway design.
Choose aggregate by function and site conditions
For a driveway, ask what each proposed material is expected to do. Is it a compactable base, a surface layer, a drainage component, or a decorative finish? A clear answer is more useful than selecting a stone based only on its color or a product name. In a multi-layer design, the materials should work together rather than being chosen independently.
When comparing options, ask the supplier or installer:
- What is the product's size range or gradation?
- Is it intended for a compacted driveway base, a wearing surface, or another use?
- Does it contain fines or a blend of sizes, and how does that relate to the planned compaction?
- Is the same product available at the warehouse that serves the job address?
- Can the material be delivered in the quantity and truck type needed for the site?
- Are placement services offered for this job, or is the order material delivery only?
A product page may help identify a material, but it does not replace a discussion about the driveway section. For example, review the information for ABC Stone as one product option and confirm its intended use, availability, and suitability for your plan. Do not infer that one listed aggregate is appropriate for every driveway or every layer.
Think about the local climate and maintenance pattern as well. Freeze-thaw cycles, heavy rain, snow removal, shade, and frequent turning can all affect how a driveway performs and how often it needs attention. These are reasons to discuss the site with a knowledgeable local installer or supplier; they do not produce one universal recipe. If the road serves emergency vehicles, public access, or heavy commercial traffic, use the applicable requirements and professional review rather than a generic residential recommendation.
Related products

Estimate the area and depth, then confirm your order quantity by the ton.
View product

Whether you're looking for decorative or functional use, this is the stone for you.
View productMeasure the driveway and estimate material volume
Quantity planning begins with the footprint and the intended compacted depth of each layer. For a simple rectangular area, multiply length by width to get square footage. Convert the planned depth to feet, then multiply area by depth to estimate cubic feet. Divide cubic feet by 27 to get cubic yards. This is a geometric estimate of the space occupied by the planned layer; it is not automatically the amount to order.
Area in square feet × layer depth in feet ÷ 27 = approximate cubic yards.
For example, a driveway section that is 12 feet wide and 60 feet long has a plan area of 720 square feet. If a project designer specifies a 4-inch layer, convert 4 inches to one-third of a foot. The calculated in-place volume is about 8.9 cubic yards before considering how the material is sold, moisture, compaction, grading, irregular edges, or other project allowances. This example illustrates the arithmetic only. It does not recommend a 4-inch layer or any particular driveway design.
Measure irregular areas by dividing them into smaller rectangles or triangles, calculating each, and adding the results. For curves, use measured segments or a reasonable area estimate from a site sketch. Include parking bays and turnarounds as separate shapes. Avoid counting the same transition area twice. A site plan with dimensions is especially helpful where driveway width changes or the route follows a curve.
Calculate each layer separately. If a project includes a base and a surface course, record their footprints and depths independently. The two layers may use different materials, and material quantity may be sold by volume or weight. Do not combine their quantities and then assume that a single product or truckload can fulfill both. Keep a note of which estimate belongs to which material and layer.
Compaction and the difference between loose delivered material and finished depth can affect the order quantity. The conversion varies with the aggregate and conditions, so do not rely on an unsupported generic adjustment factor. Ask the supplier or installer how the proposed product is sold and what information they need to help check the estimate. If a project quote includes material and placement, confirm how the quantity and scope are calculated.
For a gravel product sold by the ton, volume alone is not enough to establish weight. Bulk density depends on the particular material and conditions. Use a product-specific conversion from the supplier if available; do not apply a conversion for another stone. If ordering by yard, confirm what the product's listed unit represents and how the amount is measured. The order page or supplier should clarify product, unit, and location.
Before ordering, compare the estimate with the actual site dimensions and layer plan. Confirm whether the material estimate includes extra width for edge transitions, a turning pad, or local low areas. Avoid adding a large buffer merely to prevent a second order; excess material can create storage, handling, and drainage problems. On the other hand, an under-estimate can interrupt a crew or leave a layer unfinished. A measured plan and product-specific guidance are better than a guess.
Plan edge restraint, entrances, and transitions
Edges help define where aggregate belongs and can reduce migration into lawns or planting beds. Depending on the setting, a driveway may use a compacted shoulder, a physical edging system, an existing curb, or another detail. The right edge treatment depends on traffic, grading, drainage, maintenance, and appearance. If the driveway meets a road, sidewalk, or parking area, plan the transition as part of the whole surface rather than ending a layer abruptly.
At the street entrance, consider how vehicles turn in and out, how water flows, and whether the road authority has requirements for access or culverts. Do not build up material into a public road or block a roadside drainage path. A change in elevation can scrape vehicle undercarriages or cause loose stone to spill onto pavement. The appropriate profile and drainage connection are site-specific and may require approval.
At the home or garage, think about the threshold, foundation, walkways, and where snow or runoff will go. Keep planned grading from directing water toward a building. A driveway may need a transition surface or a drainage feature where it meets a hard surface. Confirm that the selected material and edge details will not compromise doors, accessible routes, landscape beds, or existing drainage structures.
Curves and slopes deserve special attention. Turning and braking can push loose material outward, while water can carry it downhill. A driveway surface that works on level ground may need a different plan on a grade. Do not rely on adding thicker stone to solve an unstable slope or runoff issue. Ask an experienced local professional to review steep or complex sections.
Check delivery access before selecting a fulfillment method
Material availability, delivery eligibility, and truck access are separate questions. A product listed online may be tied to a particular region or warehouse, and a delivery option may depend on the address and order details. Check the store selector and select the nearest applicable warehouse before treating a product listing or checkout result as relevant to the job. Sagamore's store and warehouse selector helps shoppers start with location qualification.
Then assess the delivery route from the public road to the intended drop point. Consider entrance width, turning radius, overhead branches and wires, gates, steep or soft ground, bridges or weight limits, and space to maneuver. A truck needs room not only to enter but also to approach and leave safely. Rain or thawing conditions can change whether a surface supports a heavy vehicle. Identify restrictions before booking, not when the truck arrives.
Tell the supplier about any narrow entrance, tight turn, low wire, soft shoulder, slope, or restriction. Share photos and measurements where useful. Ask which vehicle is proposed, what clearances it needs, and whether the drop location is suitable. Do not assume a truck can drive across a lawn, reverse along a long route, or unload exactly beside the work area. Final delivery suitability depends on the particular vehicle and site conditions.
Plan where the load can be placed. A delivery pile may need to sit near enough for equipment or wheelbarrows but not block traffic, a garage, drainage, utilities, or another contractor's work area. Keep the drop zone clear and firm. If the driveway is not yet constructed, determine whether the truck can reach a safe, stable unloading location without damaging the subgrade or adjacent property.
Pickup and delivery solve different logistics problems. Pickup may work for a smaller order and a suitable vehicle, while delivery may be more practical for bulk material. The appropriate method depends on quantity, vehicle capacity, loading arrangements, travel, and local availability. Confirm the actual fulfillment options and costs in checkout or with the company. A listed material price does not, by itself, establish the delivered project cost.
Separate material delivery from placement and construction
Ordering aggregate is not the same as hiring someone to build the driveway. A material delivery generally brings the product to an agreed drop point. It does not necessarily include excavation, grading, drainage work, fabric, spreading, compaction, or finish grading. Confirm in writing which work is included and who is responsible for each task.
If a load is simply tipped at the drop point, plan how it will be moved to the roadbed and spread. Equipment must match the site's width, turning area, ground conditions, and access restrictions. A contractor's quote may include some or all of the preparation and installation steps, while a product order may cover material only. Compare scopes line by line rather than comparing just the headline amount.
Slinger placement is a separate, equipment-assisted service that conveys eligible material to a placement area when site access and project conditions allow. It may be worth asking about for a route where a standard drop is not useful, but its suitability and reach depend on the job. It is not the same thing as ordinary delivery or complete driveway construction. Review slinger placement information and request project qualification if you are considering this option.
For a new driveway, establish who will handle layout, excavation, subgrade assessment, drainage, and compaction. If a contractor is involved, ask whether aggregate is included, which products and quantities are specified, how the material is installed, and what conditions could change the scope. If you will perform the work yourself, make sure you have appropriate equipment, safety practices, and guidance for the project. Do not assume that a delivery driver or product supplier is providing construction supervision.
Keep service inquiries separate from retail material shopping. A homeowner looking for a product can browse the location-qualified catalog and proceed through checkout. A buyer who needs installation, special placement, or a broader site plan should describe the project and request a quote. For more information on the company's offerings, review Sagamore's services; availability and scope depend on the location and job.
Review the complete order and project cost
Before buying, confirm the material, unit, quantity, warehouse, fulfillment method, and address. Check whether the order is pickup or delivery, what shipping estimate appears at checkout, and whether taxes or other charges apply. The delivered total can differ from a product's displayed material price. Do not compare a pickup material price with a delivered or installed project quote as if the scopes were identical.
For project services, request a written scope that distinguishes material from labor and equipment. Ask whether excavation, disposal of unsuitable soil, fabric, grading, spreading, compaction, drainage work, and finishing are included or excluded. Ask what assumptions were used for access, quantities, and site conditions. If a previously hidden issue changes the work, understand how the contractor will communicate and document a scope adjustment.
Material amounts and rates may differ by product, region, unit, warehouse, date, and fulfillment method. Check current location-qualified product information and checkout details rather than relying on an old estimate, an archived price, or a price someone received for a different site. If you are unsure which product or service path fits, provide the address and project details when asking for assistance.
Coordinate construction in a practical sequence
A sequence helps avoid placing material before the site is ready. The exact work plan varies, but these checkpoints can help coordinate a driveway project:
- Confirm permissions and boundaries. Resolve access, utility, drainage, and property questions before excavation.
- Mark the route and work limits. Identify the driveway edges, staging area, drop zone, and areas that must remain undisturbed.
- Prepare the site. Clear vegetation and unsuitable material as specified by the site plan. Protect utilities, drainage features, and nearby surfaces.
- Address grading and drainage. Complete the planned subgrade shape or drainage work before covering the area with aggregate.
- Verify the prepared foundation. Check that soft areas or unexpected conditions have been resolved before continuing.
- Place the base material in planned lifts. Use the agreed product and installation approach, with compaction appropriate to the material and equipment.
- Check elevations and transitions. Make sure the surface ties into entrances and adjoining areas as intended and does not obstruct drainage.
- Install the surface layer. Place the specified wearing material and finish it for the intended use.
- Inspect the completed route. Look for ponding, loose areas, uneven transitions, and material migration. Address concerns promptly with the responsible installer.
This is a planning sequence, not a technical specification or a promise that every step applies to every site. For a refresh of an established driveway, excavation or a separate base course may not be needed. A new driveway, wet site, steep grade, or commercial access route may need more extensive preparation and professional direction. Confirm the actual scope before buying materials.
Prepare the site for the delivery day
Once an order or project is confirmed, clear the access route and drop zone. Move parked vehicles, trailers, bins, and equipment. Secure pets and keep people away from the unloading area. Mark the intended pile location in a way the driver can see without placing stakes where they could create a hazard.
Make sure gates are open and note any access instructions. Tell the delivery provider about changes to the route or site since the order was placed, including recent rain, construction, parked vehicles, or new overhead obstructions. Keep a contact person available if the delivery plan allows it. A driver may need to stop if conditions are unsafe or materially different from those described.
Protect finished landscaping, pavement, and utilities around the drop zone. Confirm in advance whether the intended surface can support the delivery vehicle. Do not ask a truck to cross ground that is soft, unstable, or outside the agreed route. If the site is not ready, contact the supplier or project coordinator to discuss available options rather than improvising at delivery time.
After unloading, check that the delivered material and quantity correspond to the order documents. Keep the load ticket, receipt, and any project notes. If the material appears different from the specified product or the drop location is not as agreed, document the issue and contact the appropriate party before mixing it with other material or beginning installation.
Plan for upkeep after the driveway is built
A gravel driveway usually needs periodic attention. Traffic can move stone, rainfall can reveal low spots, and snow removal can displace surface material. Inspect the route after major storms and through the seasons. Address a small rut or drainage issue early, but first look for its cause. Repeatedly filling a depression without correcting water flow or a weak base may only repeat the problem.
Keep ditches, culverts, and other planned drainage paths clear if they are part of the design. Do not direct runoff onto a neighboring property or obstruct public drainage. Maintain edges so that gravel does not spread into a road or stormwater feature. If water begins ponding in a new location, check whether grading, a blocked outlet, or settlement may be involved.
When adding surface material later, identify the product used and the layer it serves. A compatible top-up is often easier to manage than an unrelated stone placed over the existing surface. If the driveway has developed persistent ruts or soft spots, have the cause assessed before ordering another load. The right repair may involve more than replenishing the wearing layer.
Use a pre-order checklist
Before placing a product order or requesting a project quote, gather the details below. Clear information can make it easier to determine whether the question is about material supply, delivery, placement, or construction.
- Job address and intended warehouse or service location.
- Driveway length, width, shape, and any parking or turning areas.
- Expected vehicles and whether heavy or frequent traffic is involved.
- Existing surface and known ground or drainage concerns.
- Planned layer descriptions and depths, if a design or contractor has specified them.
- Material product names, estimated quantities, and whether amounts are by ton or yard.
- Preferred fulfillment method and the intended delivery drop zone.
- Entrance width, turning room, overhead clearance, slope, ground firmness, and any weight restrictions.
- Whether you need material only, conveyor placement, or a separately quoted construction scope.
- Target work timing and any site access limits that could affect scheduling.
These details do not guarantee product availability, delivery eligibility, timing, or a particular project outcome. They give the supplier or contractor enough context to ask follow-up questions and confirm the next step.
Request help with a driveway material or service question
Common questions about building a gravel driveway
How deep should a gravel driveway be?
There is no single depth that fits every driveway. The required section depends on soil, water, traffic, material, and whether the project is new construction or a surface refresh. A site-specific plan or qualified local advice should determine layer thicknesses. Do not use the example calculation in this guide as a construction specification.
Can I put gravel directly on grass?
Spreading aggregate over grass or organic soil may leave a weak or unstable surface because the vegetation and topsoil remain beneath it. New construction commonly requires preparation of the supporting ground, but the exact work depends on conditions. Check the site and get appropriate guidance before placing material.
Which gravel is best for a driveway?
The right product depends on its role in the driveway section, local material specifications, ground conditions, and intended traffic. Ask whether a proposed product is for a compactable base, a surface layer, or another purpose. Confirm the particular product and warehouse rather than relying on a generic name or appearance alone.
How do I calculate how much gravel to order?
Measure the area, multiply it by the planned layer depth, and convert the volume to cubic yards by dividing cubic feet by 27. Calculate each layer separately. The result is an in-place geometric estimate, not always the purchase quantity. Confirm product-specific volume or weight conversion, compaction considerations, and fulfillment units before ordering.
Does a gravel delivery include spreading or compaction?
Not necessarily. A material order and a construction or placement service are different scopes. Confirm the drop method and whether any spreading, grading, excavation, compaction, or drainage work is included. Request a project quote if you need work beyond material delivery.
A durable driveway plan connects the site conditions, layer design, measured quantity, and delivery method before material is ordered. Confirm the product and service scope for the actual address, and get site-specific guidance where drainage, ground stability, or traffic makes the design more complex.
